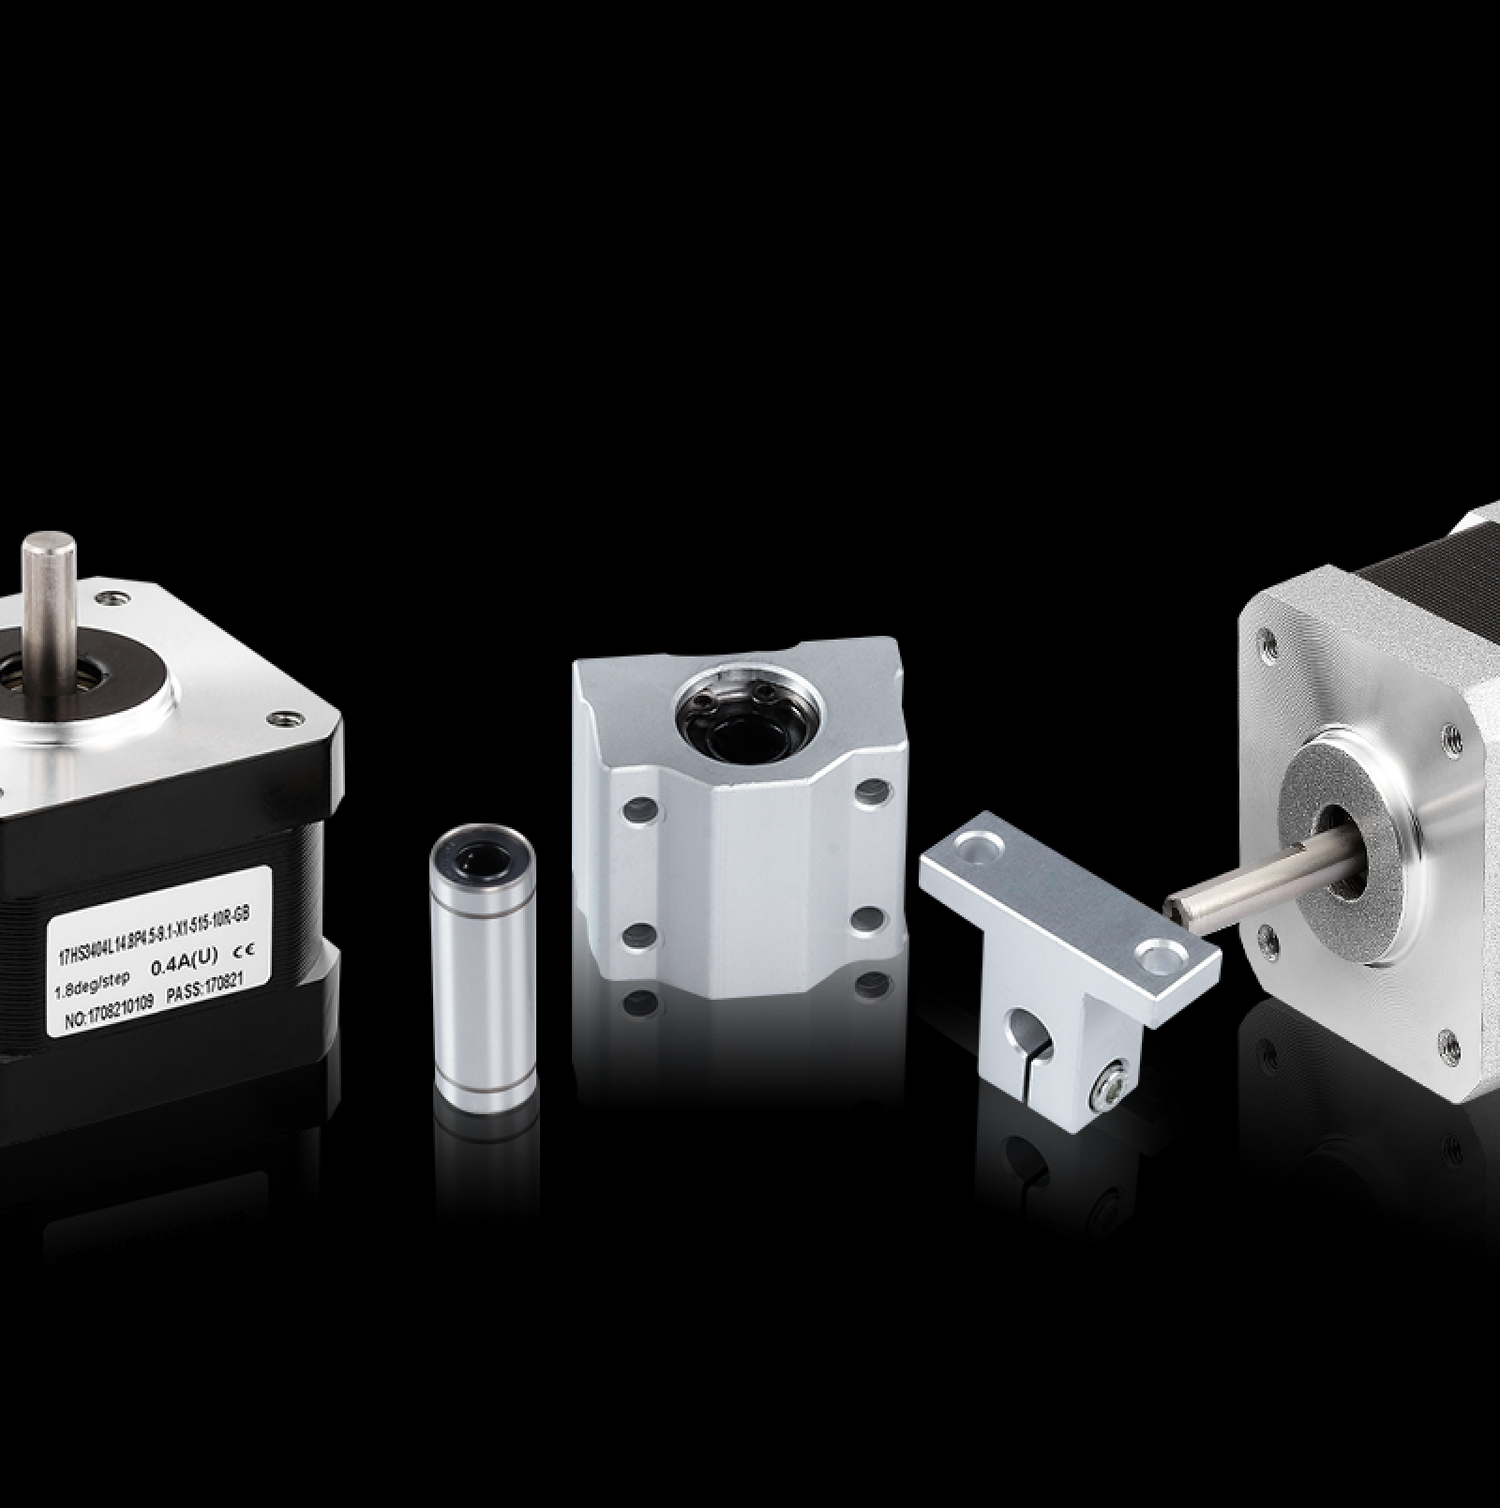
How 3D Printing is Helping to Advance Scientific Research

Restoring Museum Relics with 3D Printing
2022年3月10日
Improve 3D Print Quality by Preventing Those Pesky Blobs!
2022年3月10日
 
3D printing has been a catalyst for advances in medicine, such as with prosthetics (E-nable project) and pre-surgery models used for planning operations. Increasingly, 3D printing is being used as a scientific catalyst, offering new opportunities to view and understand complex scientific concepts We recently talked with two enthusiastic researchers about their new-found ability to 3D print complex molecular structures.
 
 
YAt the Brandeis University MakerLab, Eduardo Beltrame has been on the forefront of teaching students and educators how to print these complex models on desktop printers. Imagine helixes, oblique angles, large overhangs and intricate crevices. Yet when faced with a 3D printing challenge, Eduardo seems to embody the philosophy of “where there’s a will, there’s a way”. Eduardo assists Biochemistry students by teaching them his process, and has published his complete instructions online that contain valuable instruction for anyone interested in printing complex scientific models.


Néstor uses a variety of tools in Simplify3D to make his printing process more efficient, but his favorite is “the ability to use several processes and configurations in a single print.” This feature allows him to adjust the layer height throughout his model depending on the resolution required, significantly reducing the print time of large models while improving print quality for highly-detailed sections. Using these tools and strategies, he has replicated everything from small pieces of Roman pottery to full-scale busts and statues. After he has printed the replicas, Néstor then finishes and paints the replicas to make them look exactly like the originals. Recently he scanned a 2,300 year old statue, and 3D printed it in its actual size, over four feet tall! It was printed in twenty-one pieces, glued together over a base structure, and painted to resemble the original statue. He printed this replica for Spanish museum, Vilamuseu, to use while the original stayed at its current home, the National Archaeological Museum of Spain.


Impact of 3D Printing in Museum and Research Industries


Model manipulation in Chimera software
 
 
Eduardo shares the secrets of his workflow. He uses a blend of molecular visualization software such as UCSF Chimera for model manipulation and rendering, and programs like Netfabb to repair mesh and ensure printability.


Finally, Eduardo imports his models into Simplify3D, which he has found to be invaluable for several reasons. First, the huge files are sliced with relative ease whereas Eduardo previously hit roadblocks trying other slicing solutions. In addition, he depends on the support structures generated by Simplify3D to achieve high-quality models. To locate the supports properly, Eduardo starts with automatic support placement but then shifts to manual support editing to customize supports to fit the exact contours of the specific molecule. Finally, Eduardo spends a significant amount of time reviewing his models in the Preview Mode of Simplify3D. Using the ability to preview the exact toolpath of the printer, he fine tunes his print for maximum success and quality.

We don’t want to imply that this is a quick process. In fact, on the path to learning, Eduardo and his students are generating a boat-load of molecules, some successful and some not-so-much, but along the way, they are also generating a boat load of enthusiasm for scientific discovery. Kudos to them!


Built-up pressure inside the extruder

Blobs can occur when the built-up pressure inside the extruder nozzle pushes out more plastic than intended. If you notice that the blob is happening as the extruder finishes printing a perimeter, you may want to adjust a setting called “coasting.” This setting relieves some of the built-up pressure within the extruder by turning it off just before the end of the perimeter. Try turning this feature on and increasing the value until the blob no longer appears. Here are comprehensive instructions on how to adjust coasting.
 
 
While talking to Eduardo about his process, he introduced us to colleague experimenting with similar molecular models. James Tyrwhitt-Drake is another researcher on the forefront of 3D printed molecular models. James works with the U.S National Institutes of Health (NIH) at the NIH 3D Print Exchange, which is like Thingiverse for the life sciences – a community-driven portal that provides bioscientific and medical models for 3D printing. The 3D Print Exchange can automatically generate 3D models of more than 6 million molecules in scientific databases.


James recently sent us photos of a print that caused all of us to take a second look. While anyone who studied science may have seen a drawing of a molecule, it is fascinating to see a lifelike molecule that you can hold in your hand! The challenge he faced was printing a flexible model of an HIV protein, the ENV trimer along with and antibodies binding to it. The model was requested by a researcher at NIH who solved the 3D structure of the protein. ENV is present on the surface of HIV and helps the virus enter human cells. The model needed to be printed in flexible material in order to determine how the antibodies bind to the protein. The Flexible material mimics the flexibility of the protein and allows researchers to get a better grasp on how these different structures come together.
 
 
In order to accomplish this, James managed to print all of these elements out of NinjaFlex material. Many printing experts have been challenged to achieve high-quality results with flexible materials, but James managed to print one of the most complex models we have ever seen, including complex support structures, completely in the flexible material!

According to James, removing the supports and cleaning up the model was a bit of a challenge, but the end result allows researchers to study protein molecules with a new perspective.
 
 
Editor's Note: This article is originally appeared on www.simplify3d.com